Building a CI CD Pipeline with Jenkins Docker and Kubernetes
Ever wondered how your application can go from code on your computer to running live on the internet without you touching a thing? That is the magic of a CI CD pipeline. In this setup, we’re going to connect Jenkins, Docker and Kubernetes so the whole process is automated from pushing code to GitHub all the way to deploying on a Kubernetes cluster.
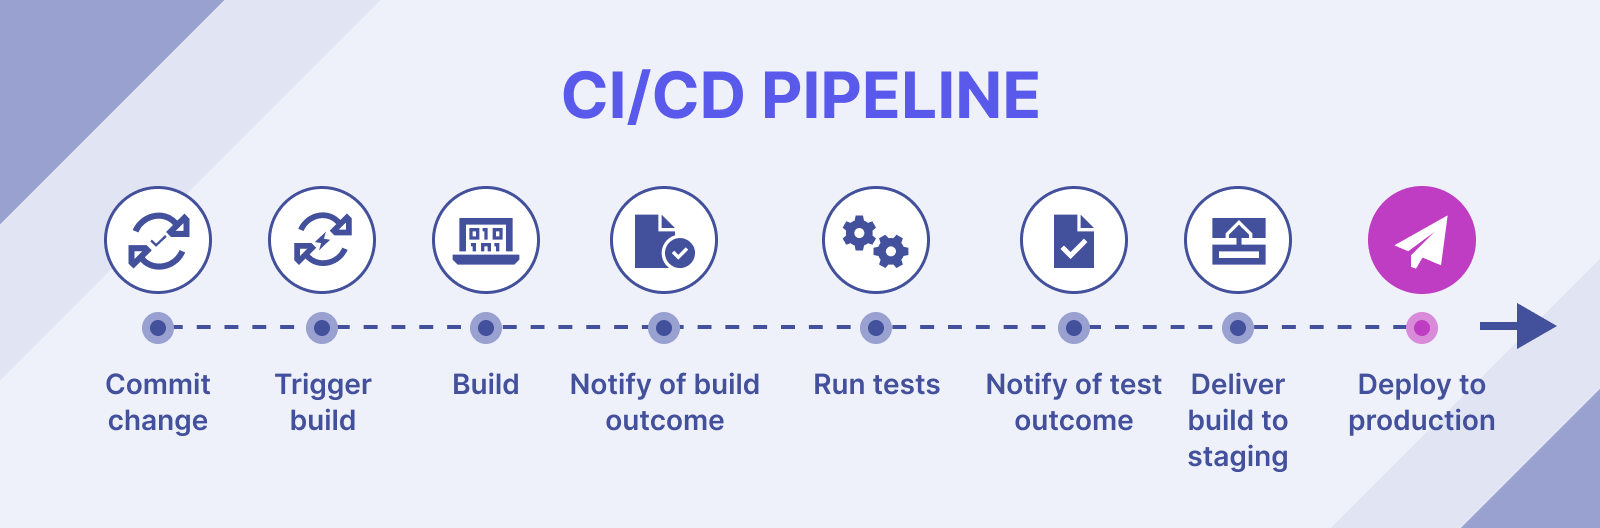
How the process flows
It all starts with your application’s code sitting in a repository like GitHub or GitLab. In our example, it is a Node.js app but it could be anything — you just tweak the pipeline script a bit.
Jenkins acts as the automation brain here. It grabs the code from GitHub, runs some steps like building a Docker image, pushes that image to Docker Hub and then tells Kubernetes to deploy it. Once it is done, you can access the application right from the internet.
- Commit code to GitHub.
- Jenkins pulls the code.
- Test the app (optional but a good idea).
- Build a Docker image of the app.
- Push the image to Docker Hub.
- Deploy to Kubernetes using that image.
- Access the running app from a browser.
Setting up Jenkins
Jenkins can be run in many ways, but here we’ll use it as a Docker container. This makes it easy to start and keeps things clean.
A quick run command creates a Jenkins container, mapping the right ports and volumes so it can also use Docker commands on the same machine. Running Jenkins in “privileged mode” lets it build and push Docker images without needing a separate slave node.
Once Jenkins is running, it asks for an initial admin password, which you grab from the container logs. After logging in, you can install the necessary plugins — Docker Pipeline and Kubernetes Continuous Deploy. The latter needs a specific older version in this case to avoid errors, so you’d upload it manually.
The Kubernetes connection
To let Jenkins talk to your Kubernetes cluster, you’ll use the cluster’s kubeconfig file. This file lives on your Kubernetes master node, usually under ~/.kube/config. Copy its content into a new Jenkins credential of type “Kubernetes configuration.”
You’ll also add Docker Hub credentials to Jenkins so it can log in and push your built image.
Now Jenkins knows how to log in to both Docker Hub and Kubernetes — the two places it needs to work with during deployment.
The application setup
- An
index.jsfile for the main logic. - A
Dockerfilethat defines how to build the image. - A
deployment-service.yamlfile that combines Kubernetes deployment and service definitions.
The service is of type LoadBalancer and exposes a NodePort, making it accessible externally.
The pipeline script
- Checkout code from GitHub.
- Build image using
docker.build(). - Push image to Docker Hub using stored credentials.
- Deploy to Kubernetes using the kubeconfig and deployment YAML.
All the variables — image name, credentials, file locations — are set at the start for easy reference.
When you run this job in Jenkins, it moves through each stage, showing logs along the way. If everything’s right, you’ll see a success message.
Jenkins vs Other CI CD Tools
| Feature | Jenkins | GitLab CI |
|---|---|---|
| Ease of Setup | Requires plugin configuration | Integrated with GitLab |
| Plugin Support | Extensive plugin ecosystem | Moderate plugin options |
| Scalability | Highly scalable with Kubernetes | Good for integrated workflows |
Seeing it in action
kubectl get deploymentsshows the new deployment.kubectl get podsshows the running pods.kubectl get svcshows the service with the external port.
Open your browser, use your cluster’s IP and the service port, and your app appears. Any extra routes you defined in the app respond too.
Wrapping it up
This setup ties together code storage, automated building, image hosting and cluster deployment into one smooth pipeline. The beauty of it is you can trigger it with just a push to your repository — Jenkins handles the rest.